
This article is written in reply to a friend who asked “How do I make T-Shirts for Redbubble with GIMP?” Because I don’t know any other way, not even with Photoshop, I knew this had to be written.
Step #1: Install GIMP. Read the fine print carefully. For Windoze users, there are components that you must install first. After you have installed, open it up for the first time.
Then rearrange your windows to look like this:

Now you will want to create a transparent image. This will serve as the template for your t-shirts. They don’t have to be built this way, but at least you’ll know how to create it.
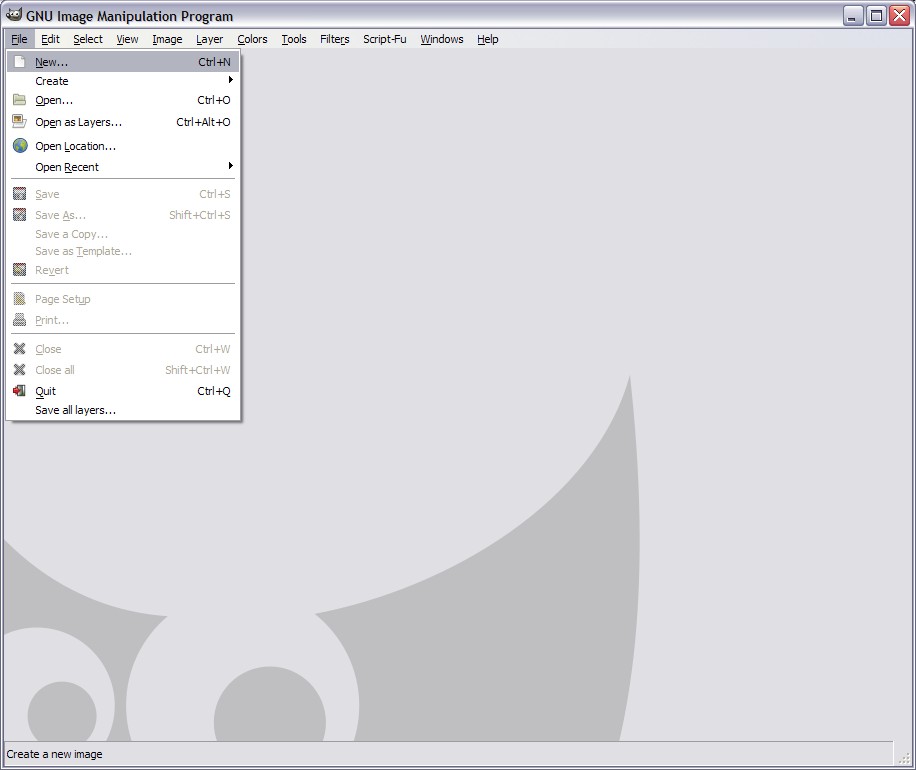
As you can imagine, Step #2 is very easy. As shown below, click on ‘FILE‘, then ‘NEW‘. Alternatively, you can open a new image with ‘CTRL + N‘
Here is the interesting bit. The window below will open, displaying an array of options.
First you can set your width and height. For the redbubble t-shirts, they need to be 2400 x 3200 pixels.
Now ‘Advanced Options‘ field – this is where it matters most in this whole tutorial. Leave defaulted to 120ppi. Because this is a transparent PNG image, you can leave the ‘Color Space‘ field as ‘RGB Color‘ and change the ‘Fill with:‘ to ‘Transparency‘. This last field can be achieved other ways, but this is the simplest way! As you can see, I’ve put my name and business into the comment.

After you have hit OK, this is what you should have:

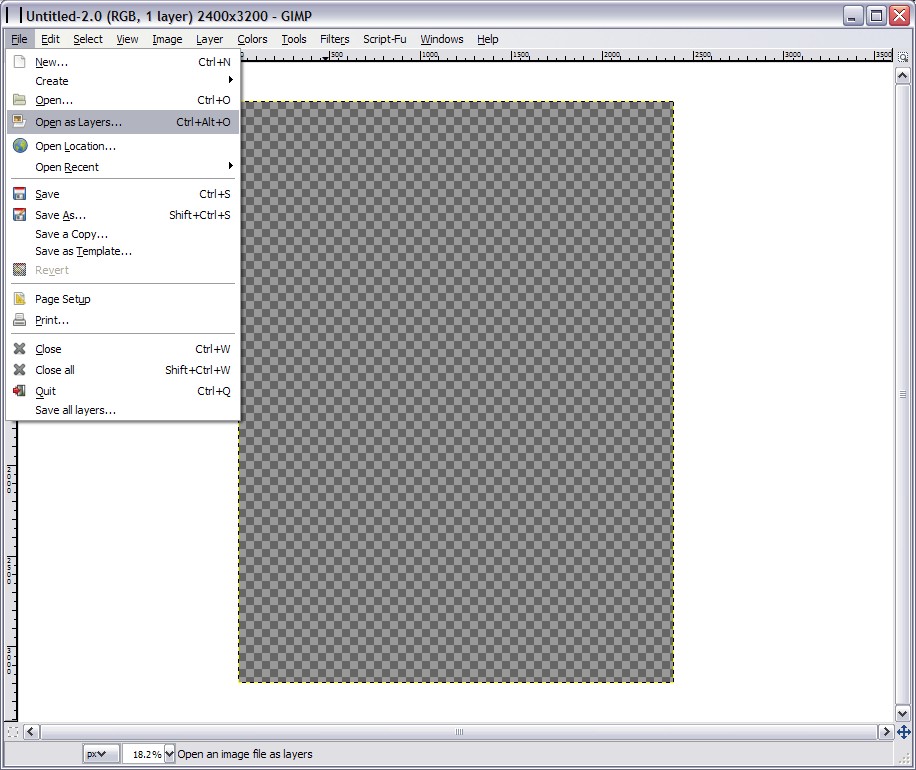
For those of you who already have an image or graphic you want to appear on your shirt, this next step will be your favourite instruction. I actually find this a LOT easier than how Photoshop has you open layers!
This is Step #3: ‘File‘; ‘Open as Layers‘ ( CTRL + ALT + 0 {~not zero, capital ‘O’})
Step #4: Save your final design in TWO formats.
Before you combine all the layers, safe it as a XCF.
This is the default-extension for GIMP, in the save way that PSD is the default for photoshop. An XCF will retain each individual layer with their individual parameters. For instance, text-layers will remain as such, thereby allowing you to edit the font-type, size and colour should you open the XCF later.
Then combine all the layers.
Don’t flatten it, as this will convert the transparent background to white (or black, though I have not seen that though have been told it’s possible!). Now save the image as a PNG.
Because of the size of your new image, a GIF is not a good idea: The compression will be hideous and the kilobyte size will be excessive. In any case, this is the only format Redbubble will accept for your Shirt!
To save, again, press ‘File’, then ‘Save as’.
This will bring up a new popup window which enables you to save under many different formats. To see this, find the little plus sign down the bottom where it says ‘Select File Type (By Extension)‘ and then choose PNG from the list of file-types. Test how much information you wish to retain in the final image.
So there you have it.
There is more to this, but that is the basics. From here, I imagine you will have fun layering many different objects, even alteration of the level of transparency. Have fun!

Discover more from Thoughts, Stories & Reflections by Stephen Mitchell
Subscribe to get the latest posts sent to your email.

[…] with XXY, and alone now, has taught me that my brain is wired differently to most – yet I…
[…] Living with XXY, and alone now, has taught me that my brain is wired differently to most – yet…